Sunday, June 22, 2014

NYX Box of Smokey Look Collection Review

Hello beautiful friends! Today, I am going to talk about NYX Box of Smokey Look Collection. I bought this online in qoo10 in Singapore.

If I can remember it right it cost around SGD $24. I wanted to buy something that I can use for years and if possible an all in one makeup kit.

The packaging is quite sturdy. It is plastic and a bit bulky since there are a ton of makeup products inside.

It has a rectangular mirror inside.


As you can see in the image below, it already has a lot of scratches but so far no cracks or whatsoever.


The palette are split into 4 section - Classic Smokey, Purple Smokey, Bronze Smokey and Natural Smokey. It also has bronzer, highlighter, contour and blushes.


At the bottom, there's a drawer filled with 16 lip colors (some are like lipstick), 12 glitter creams and 4 concealers/correctors
.


The eyeshadow colors are lovely. Even though it says Smokey look, you can always create something you really want.

If you’re addicted to smokey eyes, this kit is custom-made for you. It contains a palette of pigmented eye shadows to create gray smokey eyes, purple smokey eyes, bronze smokey eyes and natural smokey eyes. Kit also contains 3 blushers, 3 face powders, 4 concealers, 16 lip colors, 12 glitter creams and 1 black eye liner.  (source: NYX cosmetics.com)

Here are the swatches for the Classic Smokey eye shadows...


Here are the swatches for the Purple Smokey eye shadows...


Here are the swatches for the Bronze Smokey eye shadows...


Here are the swatches for the Natural Smokey eye shadows...


It also comes with quad eye shadow palettes.


Verdict
Most of the eye shadows are pigmented although there are a few of them that are not so pigmented. As you may see in the above photos, some are not so obvious especially the neutral shades.

Overall, I am satisfied. Great value for money. Great for those makeup addict or begginers who are on a budget.

The quads are great as it gives you an idea which eye shadows to combine. If you are a beginner and is afraid to experiment, these quads are great to start with. The thing that I don't like with these quads is that I have to use it carefully to avoid mixing the 2 eye shadows together during application.

The 12 lip colors are just okay. There's one lip color that I keep on using (see the arrow).


I haven't used the concealers or correctors. The consistency is creamy. I haven't used it under my eyes yet.

The least touched product in this makeup set are the glitter creams. I don't go out to parties or special events so I never used it. Though, I tried testing the product and the glitters were fine in texture and it doesn't come off easily when I rub it. Definitely, a good addition to the palette especially for someone who likes to attend special events or a themed party.

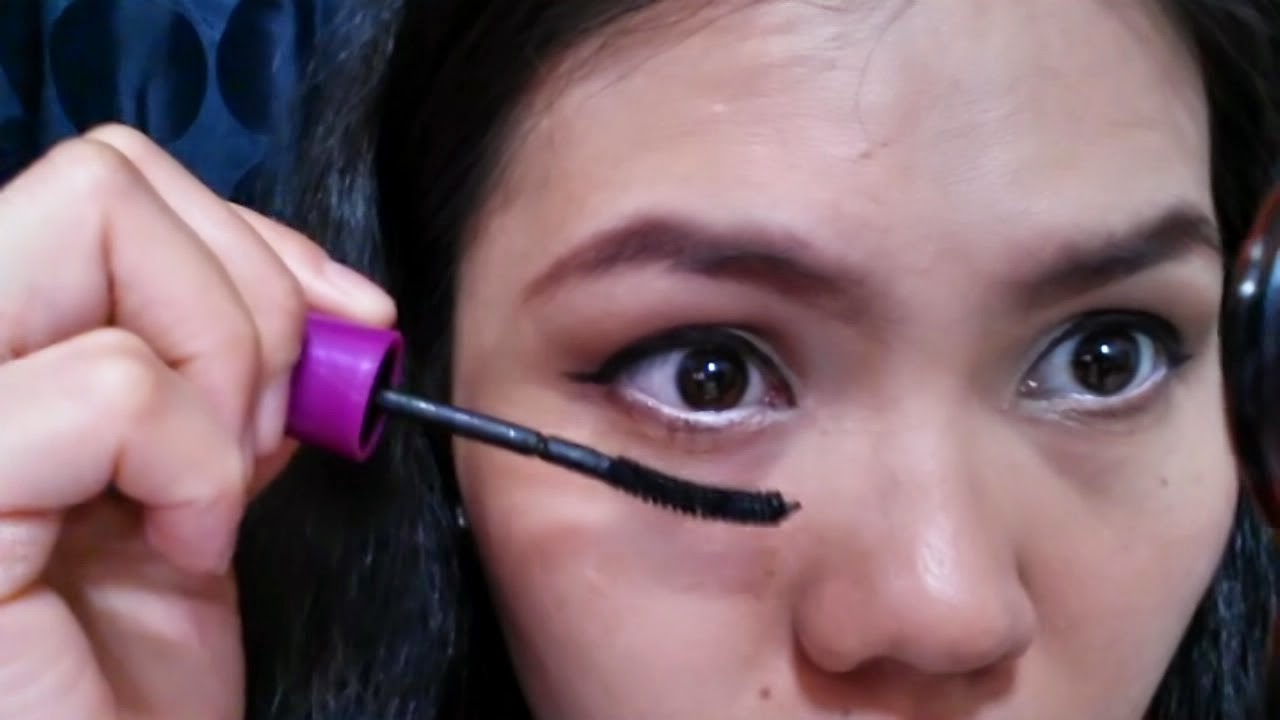
The eye liner is also okay. Nothing fancy as I can recall.

I don't carry this around during normal days. I bring this whenever I travel outside Cebu City be it overseas or domestic.

Final Verdict

Yes, I am totally happy with this purchase. For a price of SGD$24 "Super Duper Sulit na talaga ito". The quality overall is good and you get a lot of products in it.

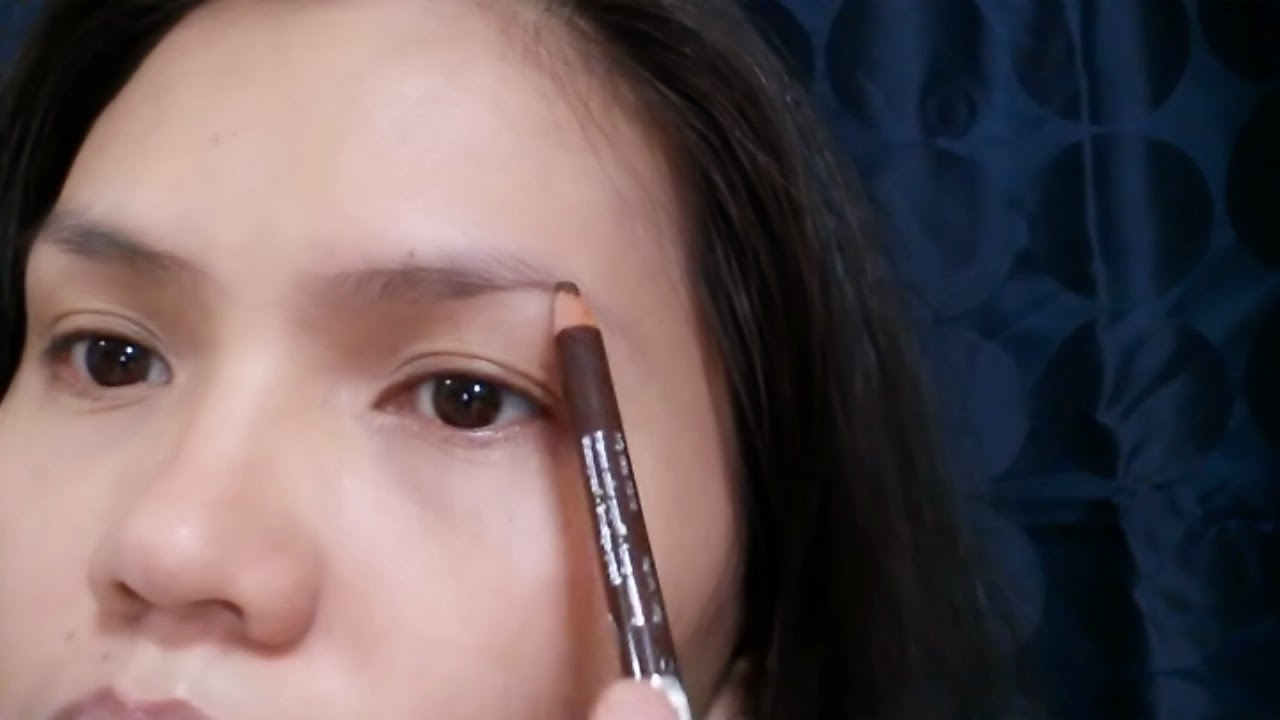
If you want to see a video/post using this makeup kit, view it here or just hit the play button below.


Thank you so much for watching and I hope I was able to help you in anyway. Talk to you soon and please let me know your thoughts in the comments below.


Friday, June 20, 2014

Everyday Makeup #3 Red Lipstick


Hello, hello Amigas! I'll be sharing another Everyday Makeup #3 Red Lipstick.

Do you like Red lips? Does your hubby like to see you wear red lipstick?

Ergh. My dearest hubby is not fond of red lips but I don't care, I still wear red lipstick. It is sexy and beautiful.

Anyway, I just want to thank you guys for watching my videos and checking out my previous posts. It really means a lot to me.

No new video tutorial yet co'z I am waiting for my new Samsung NX mini camera. I just can't wait to get a hold of it and make a bunch of videos. I got the mint color. Yay! I'll be talking about this camera soon. So, watch out for it guys. Don't forget to subscribe.

samsung nx mini mint, samsung nx mini vloggers, samsung nx mini bloggers


Now, unto our Red lipstick tutorial.

Watch the video below or keep on reading.


Step 1. Prime the face.
Product used: The Body Shop Primer
the body shop primer


Step 2. Apply foundation
Product used: Bobbi Brown Cream Foundation


Step 3. Fill-in your brows and soften it with Brow wand.
Product used: Silky Girl 2in1 Brown Milk eye pencil


Step 4. Apply corrector and concealer on under eyes and blemishes. I dabbed it using my ring finger. 
Product used: Bobbi Brown Corrector in Peach
Concearler (No name)


Step 5. Set face with powder.
Product used: Givenchy


Step 6. Apply a light eye shadow on eyelids up to brow bone.


Step 7. Apply chocolate brown color eye shadow on the crease and again don't forget to blend. I was using an eye defining brush.


Step 8. Apply liquid Eyeliner on upper lash lines.
Product use: Revlon Liquid Eye pen


Step 9. I wanted my lashes to look fuller. I apply the darkest eye shadow from the Silky Girl Blockbuster palette. I also applied the same eye shadow on my lower lash lines.


Step 10. Apply white eyeliner on the water line.
Product used: Silky Girl 2in1 Pencil

Step 11. Apply mascara on the lower and upper lashes.


Step 12. Apply blush on.
Product used: Fashion21 Duo Blush 


Step 13. Apply lip liner.
Product used: NYX

Step 14. Apply lipstick. I usually start at the cupid's bow then work my way down my lower lip. 
Product used: Maybelline Red Revival #645


Red Lipstick from Maybelline. Red lipstick Everyday makeup

In order to make it last a little longer, I used a tissue to remove the moisture from the first coat then I apply the second coat.

Red Lipstick from Maybelline. Red lipstick Everyday makeup

Red Lipstick from Maybelline. Red lipstick Everyday makeup

Step 15. Apply highlighter on cheek bone, forehead, cupid's bow and chin.
Product used: The Body Shop Radiant Illuminator

Step 16. Set face with powder.
Product used: Givenchy


Step 17. Apply false lashes (optional)
Product used: Ardell Natural Lashes


The final look.

Selfies.


Thank you so much for checking my post today. I hope you enjoyed it. Before you go, let me know your thoughts by commenting below or just tick your honest reaction below.